DIY Air-Dry Clay Projects for All Skill Levels
Introduction
DIY Air-Dry Clay is a versatile medium that has captured the imagination of artists and crafters alike. Whether you are just beginning your creative journey or have years of experience under your belt, this material offers endless possibilities for transforming simple ideas into tangible art. In this guide, we’ll explore a variety of projects, techniques, and tips to help you master the art of working with this unique medium.
Getting Started with DIY Air-Dry Clay
The first step to unleashing your creativity is gathering your supplies and familiarizing yourself with the basics. DIY Air-Dry Clay is ideal for those who prefer a kiln-free sculpting experience, allowing beginners to experiment without expensive equipment while giving seasoned artists the freedom to explore new forms. Before you begin, ensure that your workspace is well-prepared with all the necessary tools, rolling pins, sculpting instruments, and a small container of water to help smooth out details. Patience and regular practice are key when working with DIY Air-Dry Clay.
Creative Techniques and Project Ideas
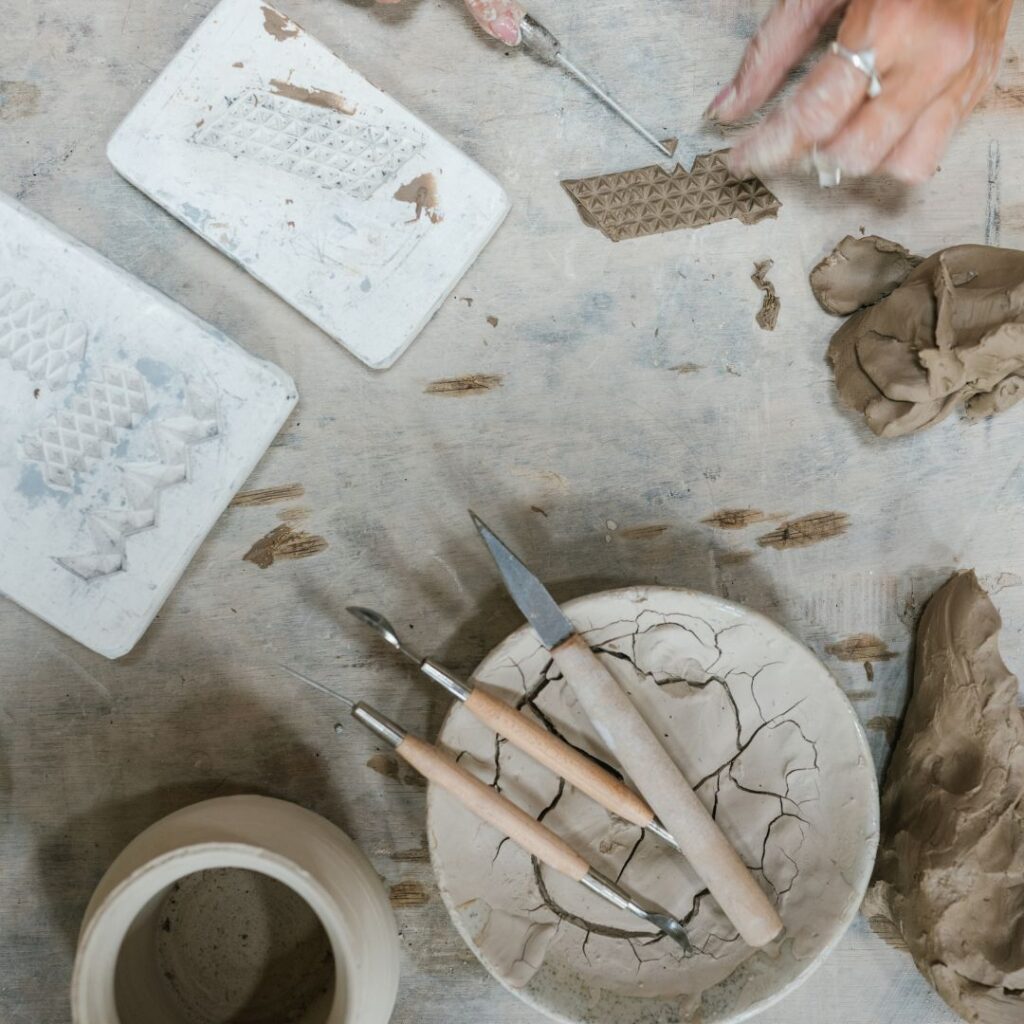
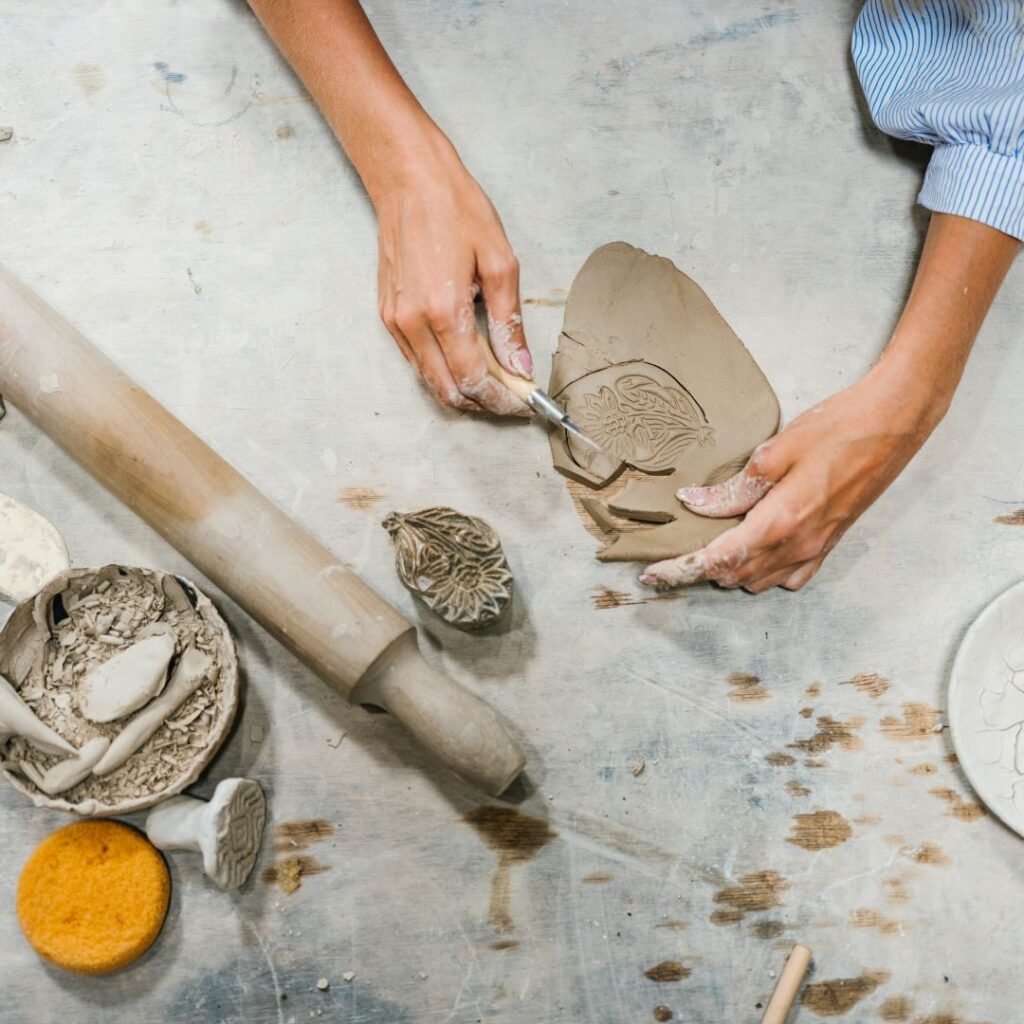
One of the most exciting aspects of working with this medium is the freedom to experiment with texture, color, and form. For example, try imprinting unique patterns using everyday household items. You can layer colors, mix materials, and even incorporate unexpected elements to produce truly one-of-a-kind art. Simple projects, such as decorative coasters or small ornaments, serve as an excellent introduction to the craft, while more intricate designs—like custom jewelry or detailed figurines challenge you to refine your skills further. DIY Air-Dry Clay projects not only stimulate your artistic side but also provide a relaxing and rewarding creative outlet.
For those who enjoy blending traditional crafts with modern influences, consider integrating elements such as lego in infinite craft into your design process. This unexpected fusion can yield innovative structures that combine the tactile beauty of clay with the modular precision of building blocks.
Techniques to Enhance Your DIY Air-Dry Clay Creations
Mastering any craft is a journey that involves learning new techniques and continuously experimenting. Here are a few strategies to help elevate your projects:
- Layering and Detailing: Experiment with multiple layers of DIY Air-Dry Clay to create depth and texture in your pieces. Use sculpting tools to carve out fine details once your layers begin to set.
- Smoothing and Finishing: A gentle mist of water, followed by careful smoothing with your fingertips or a soft brush, can transform rough surfaces into a polished finish in your DIY Air-Dry Clay work.
- Painting and Sealing: Once your creation is completely dry, apply a coat of acrylic paint or a clear sealant. This step not only enhances the visual appeal but also adds durability to your DIY Air-Dry Clay models.
Project Inspiration and Ideas for Every Skill Level
Creativity knows no bounds when it comes to DIY Air-Dry Clay projects. Beginners might start with small, manageable items like keychains, miniature planters, or cute figurines. These projects build confidence and help you understand the medium’s behavior. As you grow more comfortable, challenge yourself with larger and more detailed installations, such as personalized wall art or complex sculptures that capture a story or emotion.
For those ready to push their creative boundaries, mixing DIY Air-Dry Clay with other materials can lead to striking results. Consider combining the softness of clay with the rigidity of wood or metal accents to produce art that is both tactile and visually dynamic. The blend of different textures and elements can open up new avenues of creative expression.
Tips and Tricks for Mastering the Craft
Here are some practical tips to ensure your creative journey with DIY Air-Dry Clay is as smooth as possible:
- Preparation is Key: Organize your workspace with all the necessary supplies and protect surfaces with a disposable cover.
- Practice Makes Perfect: Start with small projects to practice various techniques before committing to larger, more ambitious designs.
- Keep It Moist: If your clay begins to dry out too quickly, cover it with a damp cloth to maintain its pliability.
- Embrace Experimentation: Always remember that with DIY Air-Dry Clay, experimentation leads to innovation. Try new techniques and don’t be afraid to make mistakes they’re a vital part of the learning process.
As you continue to explore the possibilities of DIY Air-Dry Clay, each project becomes a stepping stone toward greater mastery. Every creation, regardless of its size or complexity, enriches your understanding of the medium and builds your confidence.
Conclusion
DIY Air-Dry Clay projects open up a world of creativity for artists of all skill levels. Whether you are exploring simple forms or embarking on intricate sculptures, the versatility of this medium provides endless inspiration and opportunity. Embrace the challenges, experiment with new techniques, and most importantly, enjoy the process of bringing your creative visions to life with DIY Air-Dry Clay. Every project you complete not only enhances your skills but also becomes a testament to your artistic journey, proving that with persistence and passion, the possibilities are truly limitless.